Set Up an eSIM on iPhone for Travel (2026)
Skip roaming fees abroad by installing a travel eSIM on your iPhone. Here is how to buy, install, and switch to it without losing your home number.
Airport SIM kiosks and eye-watering roaming bills are optional now. A travel eSIM installs on your iPhone in a couple of minutes, keeps your home number active for calls and texts, and gives you cheap local data the moment you land. The trick is to set it up at home before you fly.
Quick answer
Buy a travel eSIM from a provider before your trip, then on your iPhone go to Settings, Cellular (or Mobile Service), Add eSIM, and scan the provider's QR code over Wi-Fi. After you land, open Settings, Cellular, tap the travel plan, turn it on, and enable Data Roaming for that line. Keep your home eSIM active for calls and texts, and set the travel eSIM as your data line. You can store several eSIMs and switch between them anytime.
Key takeaways
- Buy and install the eSIM before you travel, while you have reliable Wi-Fi at home.
- eSIM profiles download over Wi-Fi, not mobile data, so install them before you lose connectivity.
- Keep your home number active by leaving your primary eSIM on for calls and texts.
- Enable Data Roaming for the travel eSIM specifically; without it, the plan will not connect abroad.
- Modern iPhones store 8 or more eSIMs and can run two active at once.
Why a travel eSIM beats roaming
Carrier roaming is convenient but expensive, often several dollars a day or metered per megabyte. A local travel eSIM gives you a data allowance at local prices, frequently a fraction of roaming, while your home line stays reachable for two-factor codes and calls from family.
| Option | Cost | Setup | Keeps home number? |
|---|---|---|---|
| Carrier roaming | High daily/metered fees | None | Yes |
| Physical local SIM | Cheap, but swap needed | Buy on arrival, remove home SIM | Usually no |
| Travel eSIM | Cheap, prepaid | Install before you fly | Yes |
The eSIM route is the only one that is both cheap and keeps your home number live without juggling physical cards.
Before you leave home
Do the setup while you have solid Wi-Fi. An eSIM profile is downloaded, not beamed from a card, and it cannot come down over mobile data alone.
- Check compatibility: your iPhone must be eSIM-capable and carrier-unlocked. Most recent iPhones support multiple eSIMs.
- Buy the plan: choose a provider that covers your destination and the data amount you need. Purchase a few days out so you can install calmly.
- Install over Wi-Fi: add the eSIM at home so it is ready to activate the instant you land.
Install and activate the eSIM
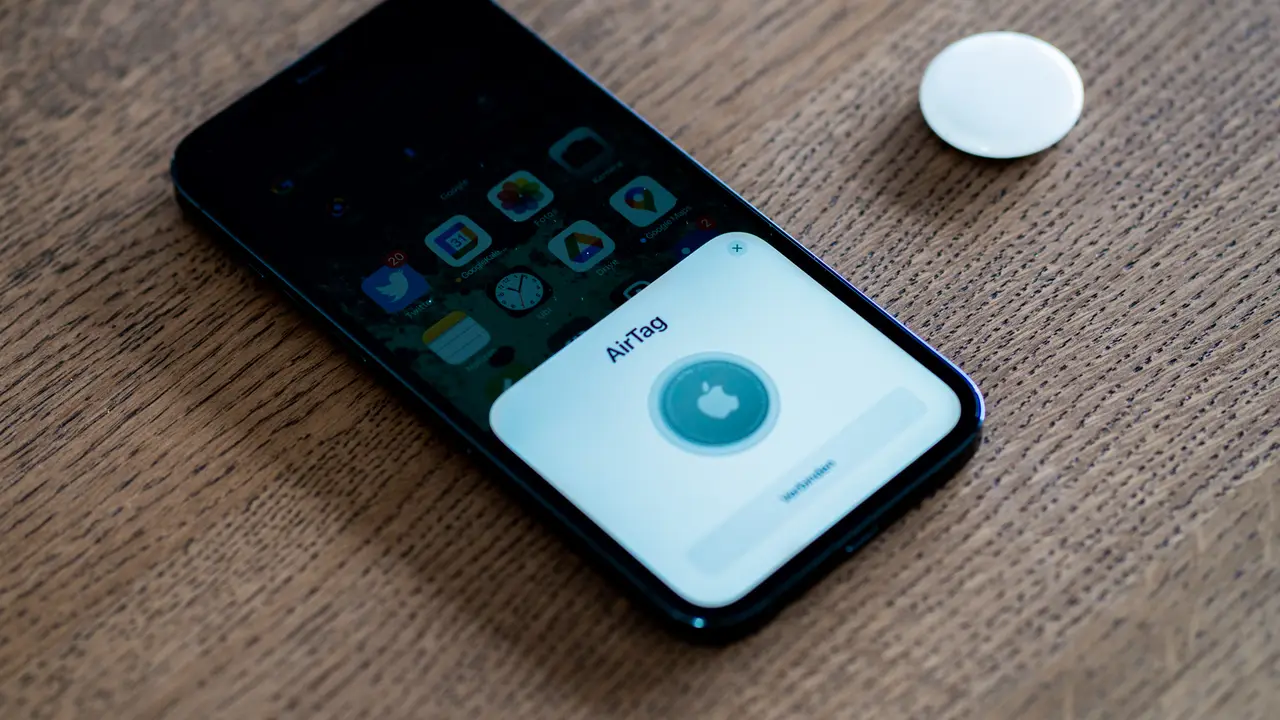
- Connect to Wi-Fi, then open Settings, tap Cellular (or Mobile Service), and tap Add eSIM.
- Scan the QR code from your provider, or enter the activation details manually.
- Label the plan clearly (for example, "Travel") so you can tell it apart from your home line.
- When you arrive, open Settings, Cellular, tap the travel plan, and turn it on.
- Enable Data Roaming for the travel line and set it as your Mobile Data line, keeping your home line for calls and texts.
The eSIM sits dormant until you activate it, so installing early costs you nothing and saves the stress of setting it up on unfamiliar airport Wi-Fi.
Warning
Enable Data Roaming only for the travel eSIM, not your home line. Leaving roaming on for your primary carrier line abroad is exactly how people rack up surprise roaming charges while using a travel plan for data.
Managing two lines abroad
With two eSIMs active you assign roles: your home number handles calls and texts (and those all-important two-factor codes), and the travel eSIM carries data. Set this under Settings, Cellular by choosing which line is Default Voice and which is Mobile Data.
If your phone shows no service on the travel line after activation, the usual culprits are Data Roaming being off, the plan not yet started at your location, or the line not selected for data. If you hit a broader signal problem, our guide to fixing an iPhone stuck on "No Service" or searching walks through the deeper resets. And before a long trip, it is worth confirming your phone is charging reliably; see why an iPhone charges slowly and how to fix it.
What to do right now
- Confirm your iPhone is eSIM-capable and carrier-unlocked.
- Buy a travel eSIM for your destination a few days before departure.
- Install it over home Wi-Fi and label it clearly.
- On arrival, activate the plan, enable Data Roaming for it, and set it as your data line.
- Keep your home line on for calls and texts, with roaming off on that line.
Frequently asked questions
Can I install a travel eSIM after I land?
You can, but only if you have Wi-Fi at your destination, because eSIM profiles download over Wi-Fi, not mobile data. Installing at home first is far less stressful and means you are connected the moment you arrive.
Will I keep my home phone number?
Yes. That is the main advantage. Leave your primary eSIM active for calls and texts and use the travel eSIM only for data. Both can be active at the same time on modern iPhones.
Why does my travel eSIM say no service after activation?
Most often Data Roaming is off for that line, or you have not selected it as the mobile data line, or the plan has not started yet at your location. Check those first before assuming a hardware problem.
How many eSIMs can my iPhone hold?
Modern iPhones store eight or more eSIM profiles and can have two active simultaneously. You can swap which stored eSIMs are active anytime in Settings, Cellular.
Do travel eSIMs give me a local phone number?
Usually they are data-only, so you keep your home number for calls and texts. Some providers offer plans with a local number, but the common travel eSIM is designed purely for cheap data.